1

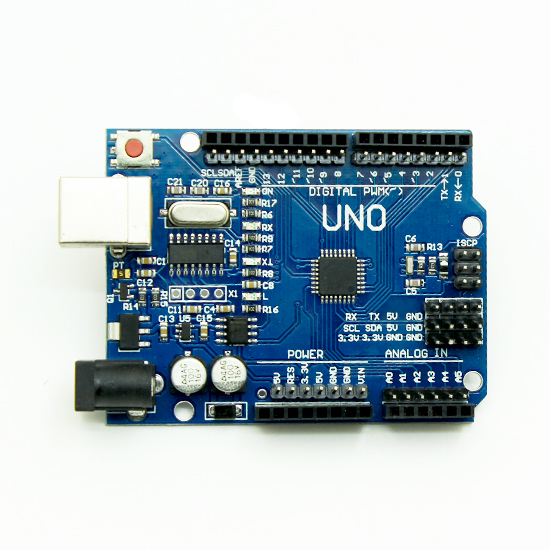
As a complete newbie, after much looking for the best bargain, I ended up buying one of these UNO R3 clones, without realizing it had the chip soldered on the board. It looks like this:

enter image description here

It works OK for development, but after that I want to get rid of the Arduino board and just use the Atmega with the minimum set of components on the final project.

As far as I understand, two tasks need to be acomplished here:

  1. Program the bootloader on the spare Atmega328P
  2. Upload code to the spare Atmega328P

Acording to this tutorial, I should be able to accomplish 1) with my "Arduino" board and a breadboard, but after that I couldn't upload any programs to that same Atme328P as the original microcontroller from the "UNO R3" should be removed and that can't be done on rip off.

Does anybody know of a method to accomplish 2) with my current setup? I also have one of those USB-to-serial converter (FTDI) boards. According to this other tutorial that can be done using it and some components, but I'd like to avoid that if, let's say, there's some trick like disabling the RX and TX line from the soldered chip by software so the external chip ones could be used instead...

7
  • 2
    You don't need to remove the microcontroller from the board. Just keep it in the reset state by connecting the reset pin to ground. That prevents the microcontroller to disturb the communication with the external atmega
    – chrisl
    Commented Feb 10, 2022 at 0:03
  • 2
    OT, you don't upload source code. You upload the executable that is compiled and linked from your source code. Commented Feb 10, 2022 at 7:13
  • 2
    1. You don't need to put a bootloader on the spare Atmega328P. The bootloader is a nice convenience for development, as it allows you to upload the program through the serial port. For the final product, if you are OK with using an ISP programmer (e.g. “Arduino as ISP”), the bootloader is not needed. Ditching it will make your sketch start way faster. 2. You don't need to remove the microcontroller from the Uno. Commented Feb 10, 2022 at 8:24
  • 1
    The idea of removing the existing MCU is either so you can replace it with yours, or to use the Arduino purely as a USB to UART adapter. For the latter just connect RESET to GND and it will disable the onboard MCU - it will be just like you have removed it.
    – Majenko
    Commented Feb 10, 2022 at 14:25
  • 1
    Yes, the first tutorial uses “Arduino as ISP” for burning a bootloader, then the USB-to-serial converter of the Arduino to burn the actual sketch through the bootloader. What I am saying is that you can forgo the bootloader and use “Arduino as ISP” (or any other ISP programmer, for that matter) to burn the actual sketch. Commented Feb 11, 2022 at 14:20

1 Answer 1

1

Thanks anyone for the comments. Very clarifying! So, all in all, the replies to my question and other doubts are:

  1. There's no need to remove the existing MCU; it's enough to connect it's RESET pin to ground (GND), so it prevents from messing with the external Atmega, and
  2. There's no need to have a bootloader on the "final" product, as it's only a convenience when developing which allows to upload the program easily.

Your Answer

By clicking “Post Your Answer”, you agree to our terms of service and acknowledge you have read our privacy policy.

Not the answer you're looking for? Browse other questions tagged or ask your own question.