0

I have an Arduino program that uses the Thread library to create two concurrent threads, where:

  • Thread #1 blinks an LED every 500ms; and
  • Thread #2 blinks another LED every 250ms

I wired things up, flashed the program to my Arduino Due, and it ran beautifully.

I am now trying to add a 3rd thread that sweeps a servo back and forth.

Here's my design:
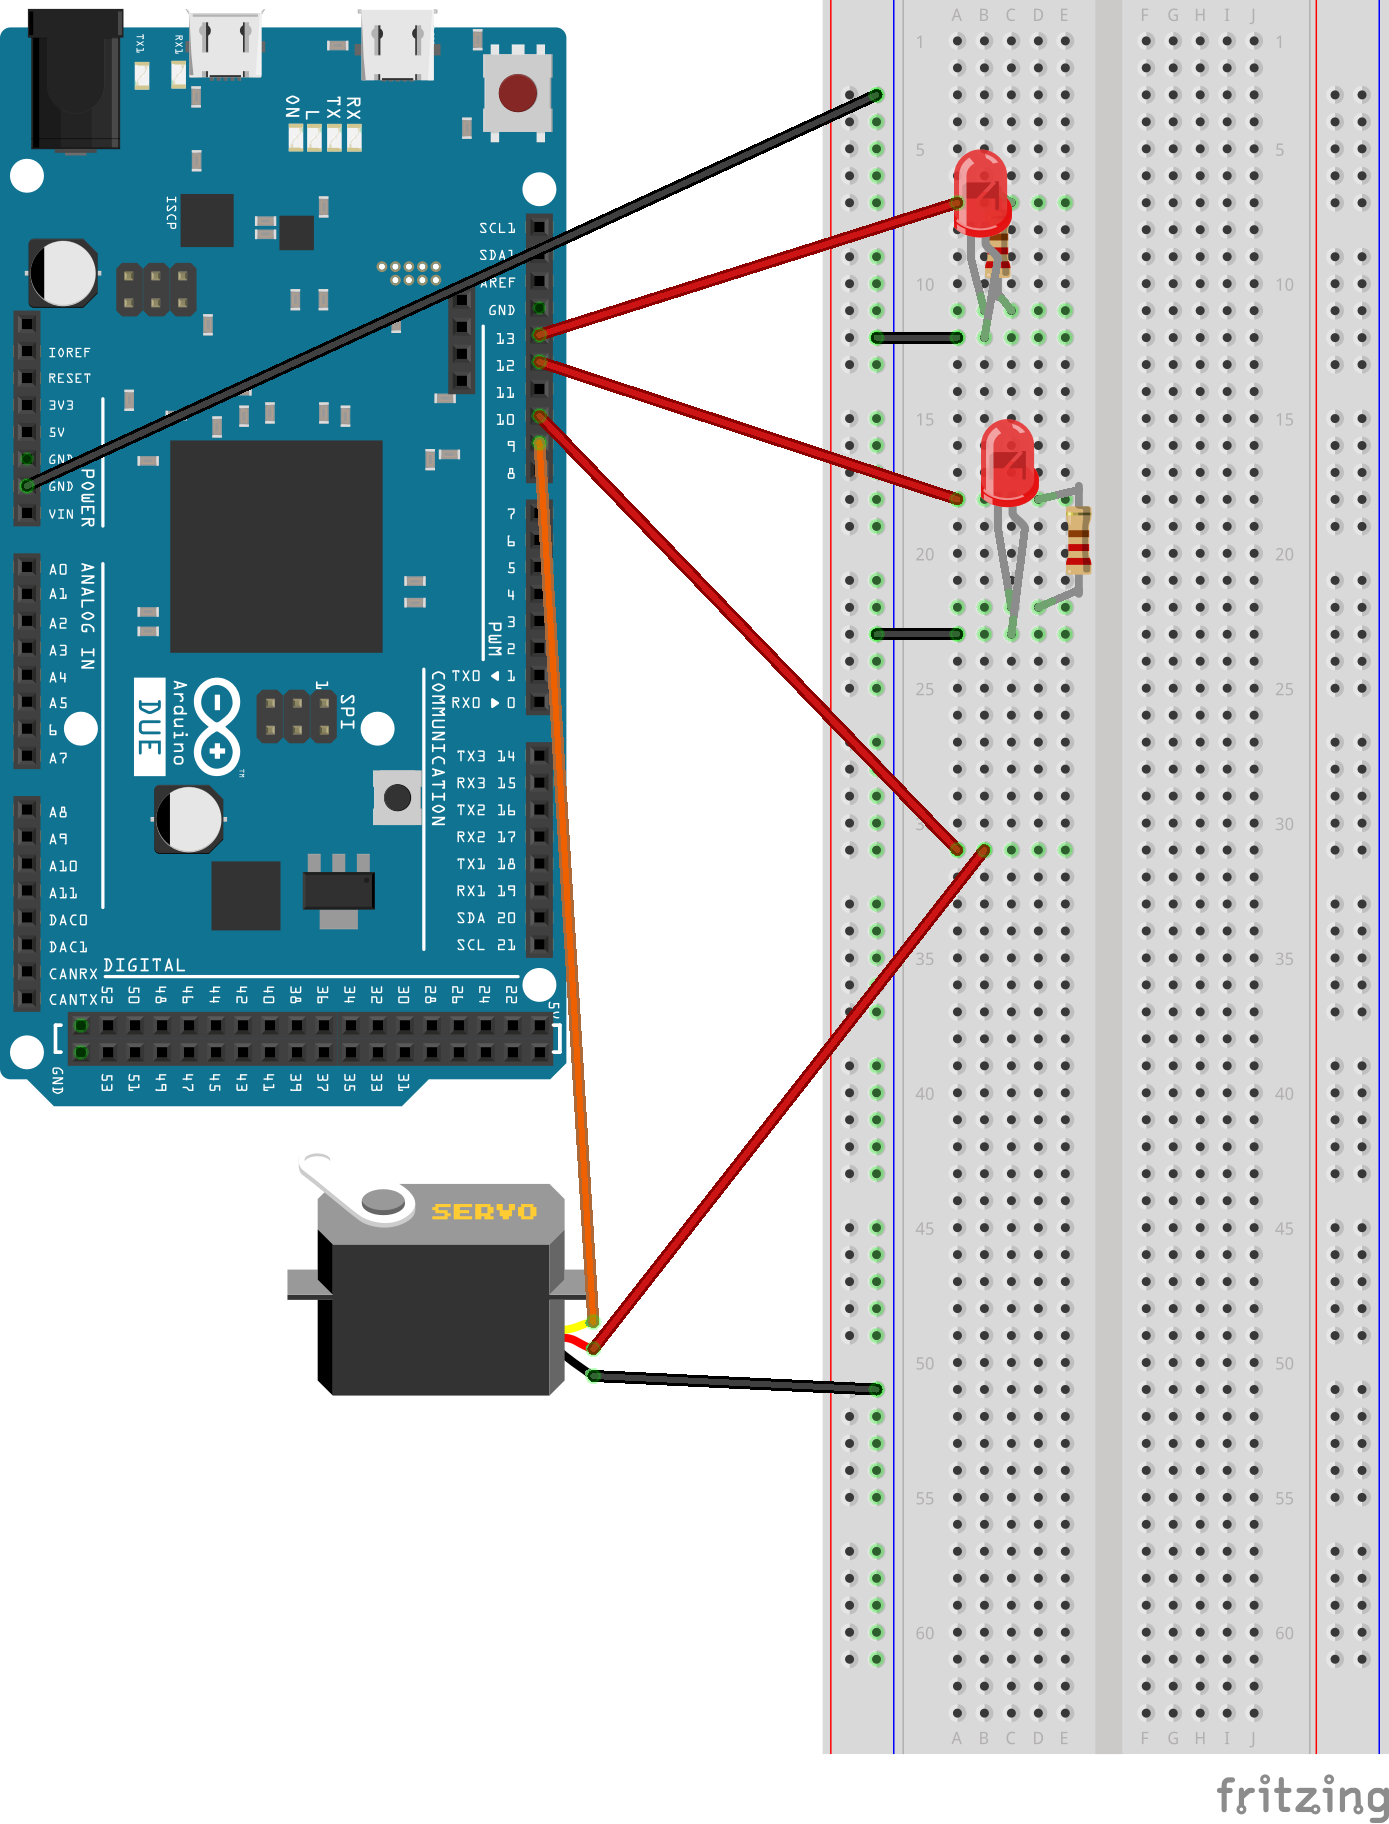
enter image description here

And the schematic that Fritzing generated for me:
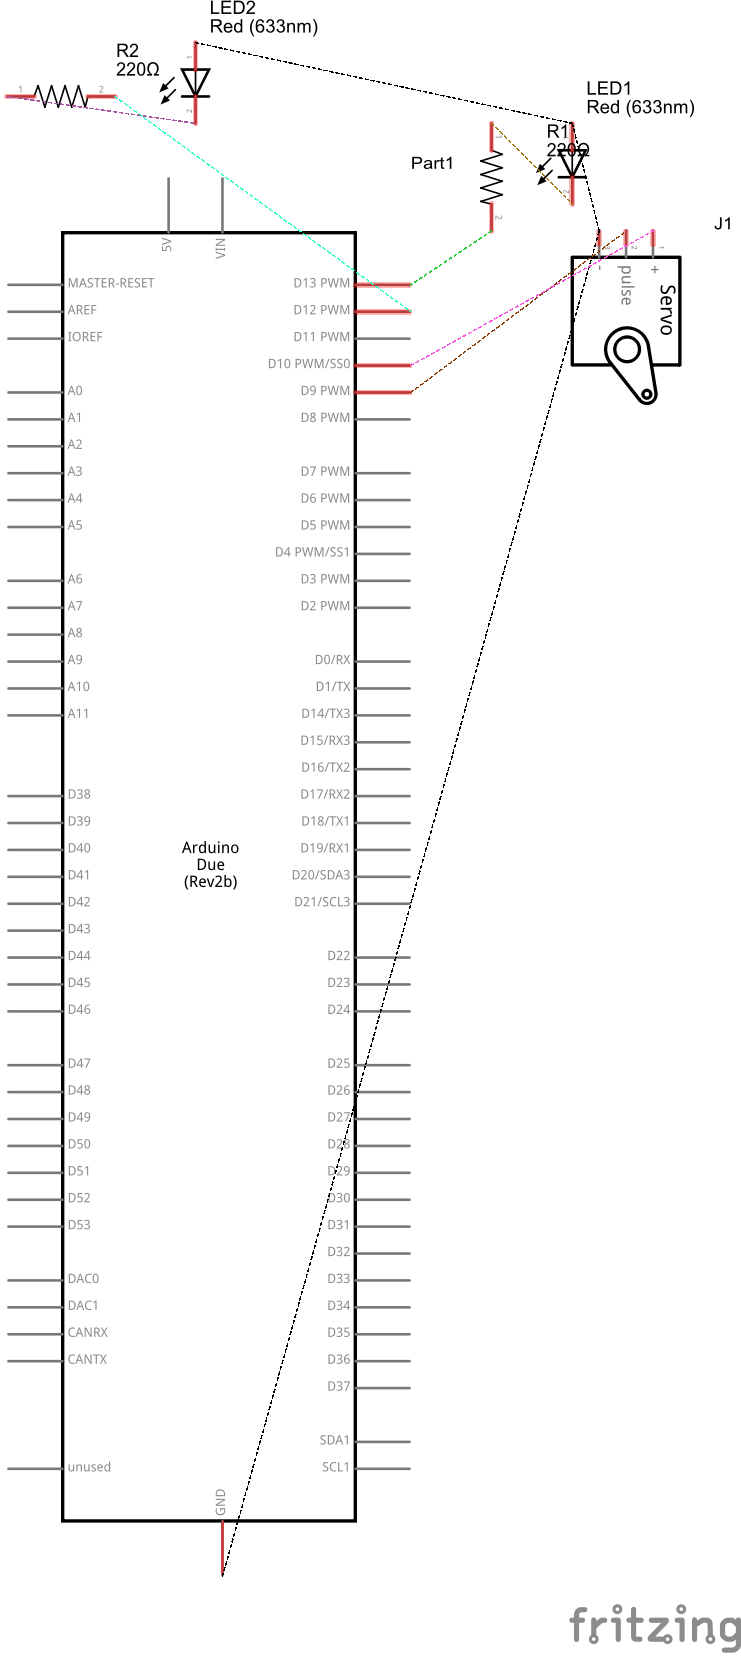
enter image description here

And an accompanying actual picture of the wire up:
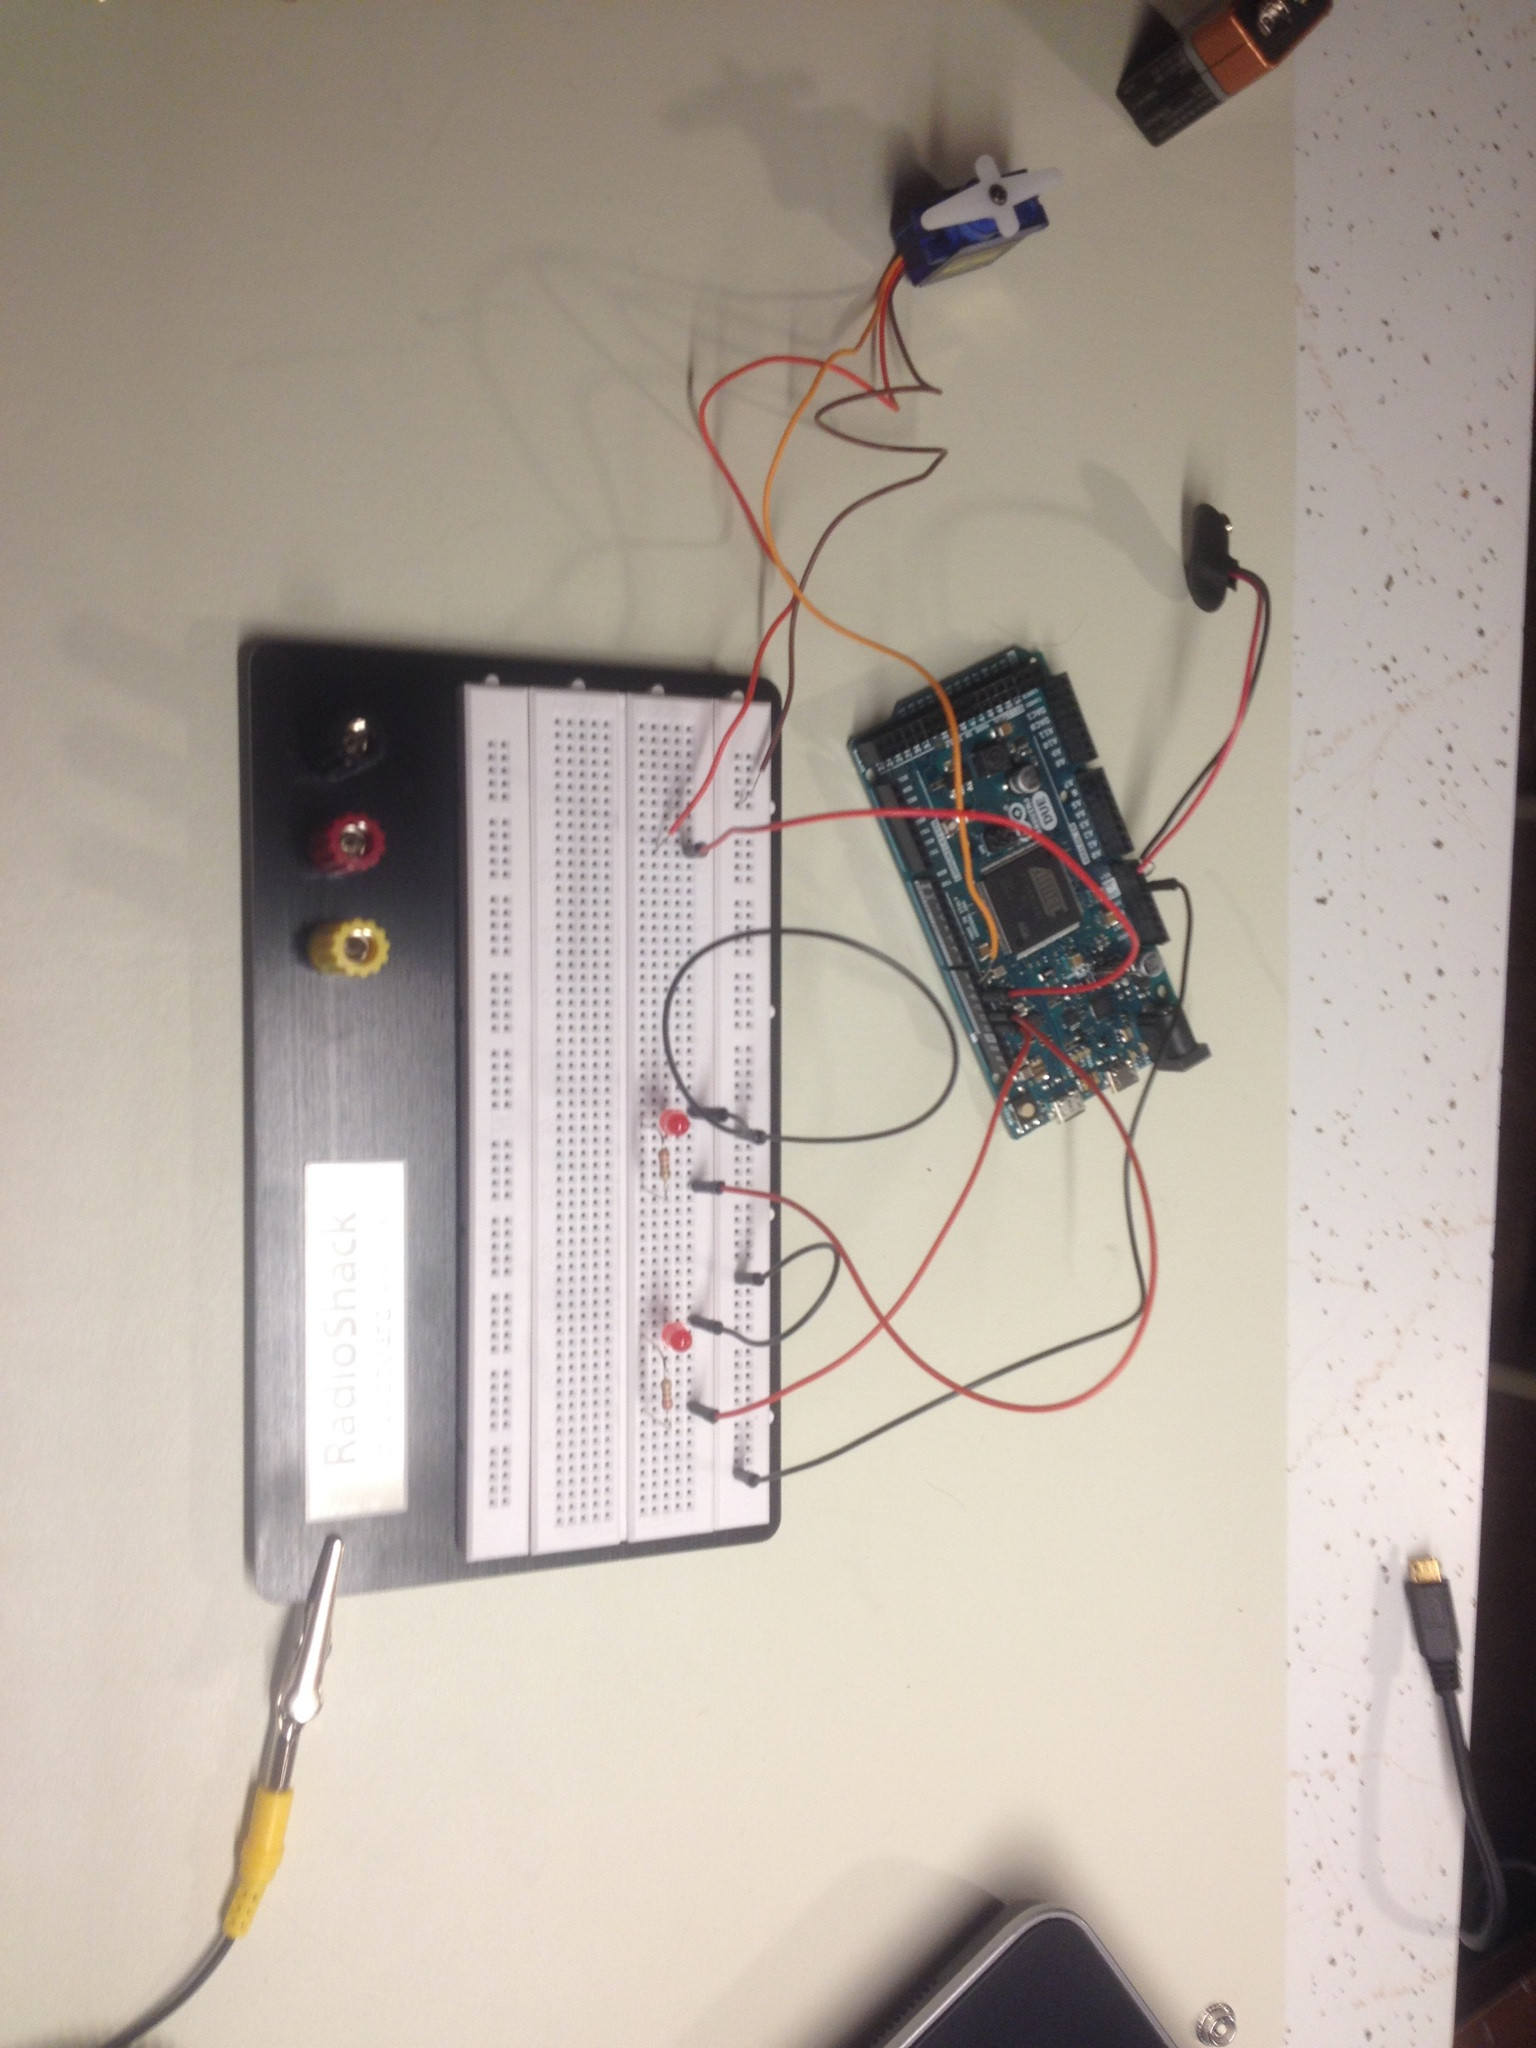
enter image description here

If you can see it, I've rigged Pin 10 as an OUTPUT, and attached the servo's signal line to Pin 9. Here's the code:

#include <Thread.h>
#include <ThreadController.h>
#include <Servo.h>

int SERVO_SIGNAL_PIN = 9;
int SERVO_PWR_PIN = 10;
int LED_1_PIN = 12;
int LED_2_PIN = 13;

Servo servo;
int pos = 0;

static bool LED_1_STATUS = false;
static bool LED_2_STATUS = false;

Thread blinkLED1Thread = Thread();
Thread blinkLED2Thread = Thread();
Thread servoThread = Thread();
ThreadController master = ThreadController();

void setup() {
    pinMode(LED_1_PIN, OUTPUT);  
    pinMode(LED_2_PIN, OUTPUT);
    pinMode(SERVO_PWR_PIN, OUTPUT); 

    servo.attach(SERVO_SIGNAL_PIN);

    blinkLED1Thread.onRun(blinkLED1);
    blinkLED1Thread.setInterval(250);

    blinkLED2Thread.onRun(blinkLED2);
    blinkLED2Thread.setInterval(500);

    servoThread.onRun(runServo);

    master.add(&blinkLED1Thread);
    master.add(&blinkLED2Thread);
    master.add(&servoThread);
}

void loop() {
    master.run();
}

void runServo() {
    // Give the servo a few seconds to reset to the starting position.
    servo.write(0);
    delay(5000);

    while(true) {
        for(pos = 0; pos < 180; pos += 1)  {
            servo.write(pos);
            delay(15);
        } 

        for(pos = 180; pos >=1; pos-=1) { 
            servo.write(pos);
            delay(15);
        } 
    }
}

void blinkLED1() {
    LED_1_STATUS = !LED_1_STATUS;
    digitalWrite(LED_1_PIN, LED_1_STATUS);
}

void blinkLED2() {
    LED_2_STATUS = !LED_2_STATUS;
    digitalWrite(LED_2_PIN, LED_2_STATUS);
}

When I flash this to the Due, two disappointing things happen:

  1. The LEDs, which previously blinked at the correct rates, now stay lit and do not blink at all; and
  2. The servo doesn't move

Now perhaps I have a bum servo, or perhaps I haven't wired it up correctly, but the most concerning thing to me is that the LEDs are no longer blinking. I have a feeling that once I get those blinking again, the servo will probably start sweeping as well.

Can anyone spot anything that jumps out at them as being wrong here, wiring and code alike?

2
  • 1
    The whole point of the (misnamed) Threads library is to avoid calling delay(). Do not delay() inside a thread! Commented Jun 12, 2015 at 12:11
  • Thanks @EdgarBonet (+1) - can you confirm that delay(...) called in one "thread" would block/lock progress in other threads? Thanks again!
    – smeeb
    Commented Jun 12, 2015 at 14:14

1 Answer 1

2

One thing that immediately jumps out at me is you are trying to power the servo from a digital pin. That is very very wrong.

The servo must be powered from the +5V pin (or +3.3V pin if it's a 3.3V servo) and only the "pulse" pin is connected to an Arduino's PWM capable IO pin.

Also, I don't know how the "Threads" library works, but it looks to me like it's not real threads, but a "round robin" execution of function with time delays. If one of your functions never returns (like your servo one) then the whole system will lock up. You need to make your servo function non-blocking like your LED functions. Give it a 15ms time setting and only move one step of the servo each time it gets called.

Ok, according to comments and research I can confirm that in fact the Thread library is really badly named. It doesn't run threads, it just runs different functions at different times. Those functions MUST be "single shot" - i.e., they MUST complete before anything else can happen. There is absolutely no concurrency whatsoever. It is entirely up to you to ensure that all your "threads" are fairly simple repetitive operations which are to be run at specific points in time.

Basically the operation is thus:

  • Add a function and its time to a list.
  • Work through the list to find a function whose time has expired
  • Call that function
  • Continue through the table
  • Go back to the beginning

If you have two functions both with the same time then one function will be called first and execute to completion, then the other function will be called afterwards, to execute to completion. Only when a function returns is the system able to move on to the next entry in the function list.

You must not use delay() in your "thread" functions for anything more than maybe 1-2ms of delay in total. You MUST return from your thread with enough time for your next timed event to execute, otherwise it will be delayed, or never run at all.

So your servo thread would look something like this:

  1. Add my current "direction" to the servo value
  2. If the servo value < 0 or > 180 then invert the direction and limit the value to 0-180.
  3. Write the value to the servo

That is then triggered every 15ms by the thread library.

So as real code it may look like:

void runServo() {
    static int direction = 1; // 1 = up, -1 is down
    static int value = 0;

    value += direction;
    if ((value <= 0) || (value >= 180)) {
        direction = 0 - direction; // Change direction from + to - or - to +
    }

    value = max(min(180, value), 0); // Clamp it to between 0 and 180

    servo.write(value);
}
7
  • You are right about the Threads library not implementing threads. It's only for scheduling tasks implemented as functions. master.run() will check whether any registered task is due to run and, if it is the case, call the corresponding function. Commented Jun 12, 2015 at 12:05
  • Thanks @Majenko (+1) - please see my question under Edgar Bonnet's comment (under the original question) - I have the same question for you! Thanks again!
    – smeeb
    Commented Jun 12, 2015 at 14:14
  • See my edit. It makes it plain.
    – Majenko
    Commented Jun 12, 2015 at 14:25
  • Replace value = 0 - direction; by direction = -direction. Commented Jun 12, 2015 at 14:39
  • @EdgarBonet What's the difference? In my version it shows that you are subtracting it from 0. In your version you are subtracting it from 0 but not showing it. It's explicit in mine, and results in the same code.
    – Majenko
    Commented Jun 12, 2015 at 14:47

Your Answer

By clicking “Post Your Answer”, you agree to our terms of service and acknowledge you have read our privacy policy.

Not the answer you're looking for? Browse other questions tagged or ask your own question.