I think the first best choice is to remove the ATMega328p-pu chip from your Arduino UNO and incorporate it into your final circuit.
The chips are only about $1.50.
That way, you can just use your UNO as a programmer instead of the final device that you deploy.
I'm not sure why there isn't more documentation about the proper way to remove the ATMega328p-pu chip and using it on your breadboard, after completing your programming.
I explain exactly how to do this on my blog: http://raddev.us/arduino/post/2018/07/03/arduino-uno-using-your-atmega328p-u-as-stand-alone
But, here are the basics.
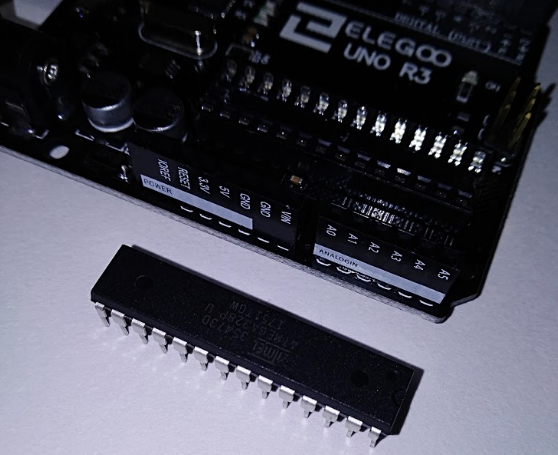
First you remove the chip. It will look like the following after you do so. (Note: I'm using the Elegoo clone of an UNO).

Next, you apply power to pin 7 and connect pin 8 to GND.
Need A 16MHz Crystal
But, the chip won't seem to run your sketch at this point.
That's because you actually need a crystal to run at 16MHz.
The UNO board has that chip installed and that is why it works.
You can see it here:

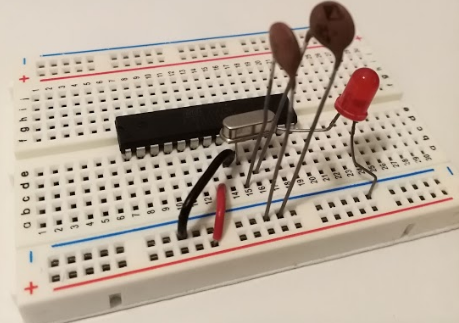
Finally you add the 16MHz crystal and a couple of 22pF caps and your chip will run standalone (no UNO).
You add the crystal to pins 9 & 10. You can see all the details by reading my blog entry or reading the atmega328 datasheet.

Finally, Just Wire Everything Else Up
After that, just wire the rest of your circuit up to the proper pins and you can run your ATMega328p-pu standalone.
It's actually a nice learning experience too.
Just buy replacement atmega328p-pu chips for your UNO and you can create all the projects you want to for very cheap.


