1

I'm brand new to the Arduino world. I recently purchased a NodeMCU in order to have it act as a sort of foothold to get into Arduinos as it's something I've always wanted to do. However, it was only after I had received the NodeMCU that I realised that there was no default option in the Arduino IDE to flash to a NodeMCU and soon found out that this is because the NodeMCU is in fact not an Arduino and therefore has its own proprietary flashing software for .bin files. This initially confused me as an outsider as I assumed all devices of that nature must be Arduinos.

I recently came across a Homebridge plugin by affix called homebridge-mcu-lamp which uses a NodeMCU running an HTTP server to control a relay. Interestingly, the script he has included in the repository which he claims to have running on his NodeMCU is a .ino file which really confused me.

My question is: how would I flash a .ino file to a NodeMCU like the one mentioned above as I have no experience with .bin files and would much more value to treat the NodeMCU as an Arduino instead (i.e. programming in C++)?

I understand this may sound like a very simple/dumb question for most of you on this forum but it is something that has had me stumped for days and would really appreciate some guidance on.

I would also find it useful if someone could explain to me the difference between a NodeMCU and an ESP8266 as I see the two words being used interchangeably when referring to the same looking board.

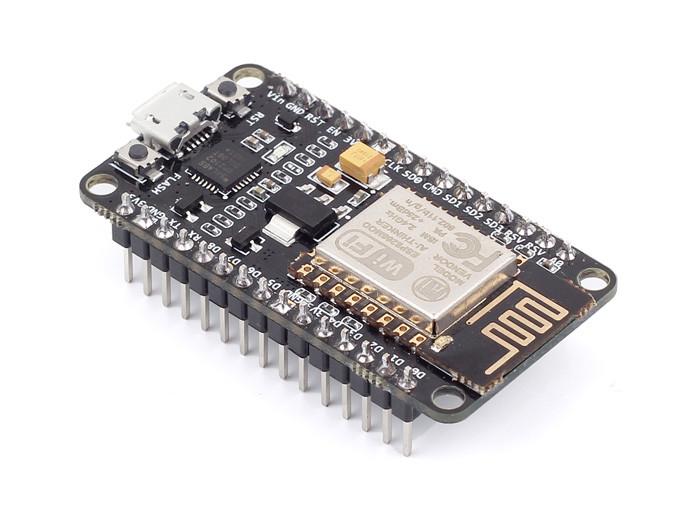
This is what my NodeMCU looks like:

NodeMCU

1
  • esp8266 is a chip under the metal shield of the esp-12 module. esp-12 module is the board glued to the NodeMcu board
    – Juraj
    Commented Jul 20, 2018 at 5:14

1 Answer 1

1

Last question first: The ESP8266 is the main IC on the NodeMCU board.

This is similar to the idea that an ATMega328 is the IC on Arduino Uno.

A normal 'clean' Arduino IDE install can work with an Uno ('flash with an INO'), but not with an ESP8266 based board. For this, you will need the ESP8266 addon for the Arduino IDE, after which, the NodeMCU board is available as an option.

This page documents the ESP8266 addon: https://github.com/esp8266/Arduino

Long story short, open preferences (File -> Preferences) , under Additional Board Manager URLs, add http://arduino.esp8266.com/stable/package_esp8266com_index.json

Click on Tools>Board>Board Manager (assuming you have Arduino IDE 1.6.4 or later) and search for ESP8266 and install the option that includes NodeMCU.

6
  • Thank you so much for your reply, that was exactly what I was looking for! Last question; apart from having to install the ESP8266 adding separately, will everything else work exactly the same as if it was an Arduino board (I.e. will the flashed software work exactly the same without any adjustments? Thank you once again!
    – Tom
    Commented Jul 20, 2018 at 10:01
  • Sorry, quick question, which buttons do I need to hold down when flashing from the Arduino IDE to the NodeMCU?
    – Tom
    Commented Jul 20, 2018 at 12:23
  • unless the nodeMCU is defective or a prototype, you should not need to hold down any buttons to flash from the arduino IDE
    – dandavis
    Commented Jul 20, 2018 at 17:02
  • @dandavis Perfect, thank you so much for your help!
    – Tom
    Commented Jul 21, 2018 at 2:41
  • @Tom, there might be some subtle differences between how a 'proper' Arduino board like an Uno might behave compared to the NodeMCU, but this will depend on the function or library you are trying to use. Most 'core' Arduino functions should work very closely. The page I linked above is probably the best reference for this sort of thing.
    – user85471
    Commented Jul 22, 2018 at 6:32

Your Answer

By clicking “Post Your Answer”, you agree to our terms of service and acknowledge you have read our privacy policy.

Not the answer you're looking for? Browse other questions tagged or ask your own question.